Vertical metal siding is a popular choice for its durability‚ modern appearance‚ and low-maintenance requirements․ This guide provides a comprehensive overview of the installation process‚ ensuring a successful and professional finish for your project․
1․1 Benefits of Vertical Metal Siding
Vertical metal siding offers numerous advantages‚ including durability‚ low maintenance‚ and a sleek‚ modern appearance․ It provides excellent weather resistance‚ protecting buildings from rain‚ wind‚ and extreme temperatures․ Available in various colors and styles‚ it enhances curb appeal while requiring minimal upkeep․ The material is also fire-resistant and can withstand pests and rot․ Its long lifespan and energy efficiency make it a cost-effective choice for homeowners and builders seeking a reliable exterior solution․
1․2 Importance of Proper Installation
Proper installation of vertical metal siding is crucial for ensuring durability‚ weather tightness‚ and a polished appearance․ Incorrect techniques can lead to leaks‚ warped panels‚ and structural issues․ Following a detailed guide helps prevent common mistakes‚ such as misaligned panels or insufficient fastening․ Proper installation also maximizes the siding’s lifespan‚ maintaining its aesthetic and protective qualities․ It ensures safety and avoids costly repairs‚ making adherence to installation best practices indispensable for a successful project․

Tools and Materials Needed
Essential tools include metal shears‚ drills‚ screwdrivers‚ and measuring tapes․ Materials required are metal panels‚ fasteners‚ flashing‚ and trim for a secure installation․
2․1 Essential Tools for Installation
The installation of vertical metal siding requires specific tools to ensure accuracy and safety․ A power saw or metal shears are necessary for cutting panels․ Drills and impact drivers are used for driving screws․ Measuring tapes and levels help maintain alignment and evenness․ Gloves‚ safety goggles‚ and steel-toe boots are crucial for protecting against sharp edges and falling debris․ Additionally‚ a ladder or scaffolding may be needed to access higher areas safely during the process․
2․2 Required Materials and Accessories
Essential materials for vertical metal siding installation include durable metal panels‚ weather-resistant fasteners‚ and trim pieces․ Flashing is necessary for sealing edges and corners․ Underlayment materials‚ like foam or plywood‚ ensure a smooth surface․ Sealants and caulks are used to weatherproof gaps․ Accessories such as J-channels‚ utility channels‚ and furring strips help secure the siding and maintain alignment․ These components work together to provide structural integrity and a polished finish for your exterior project․

Site Preparation
Ensure the substrate is secure and level․ Check for any damage or unevenness that could affect installation․ Proper site preparation guarantees a smooth and even surface for siding․

3․1 Checking the Substrate
Before installation‚ inspect the substrate for damage‚ rot‚ or unevenness․ Ensure the surface is clean‚ dry‚ and structurally sound․ Address any issues by repairing or replacing damaged areas․ Verify that the substrate is level and plumb‚ as irregularities can lead to installation challenges․ Clean the surface thoroughly to remove dirt‚ debris‚ or old adhesives․ A well-prepared substrate ensures proper panel alignment and a secure‚ long-lasting installation․ Professional inspection may be necessary for severe damage․
3․2 Ensuring a Level Surface
A level surface is crucial for proper vertical metal siding installation․ Use a carpenter’s level to verify the substrate is even․ If necessary‚ install shims or furring strips to create a flat surface․ Uneven areas can cause panels to warp or misalign․ Ensure all walls are plumb and adjust as needed․ A level surface guarantees panels fit securely‚ preventing water infiltration and ensuring a smooth‚ professional appearance․ Proper alignment is key to achieving a durable and visually appealing result․
Safety Precautions
Always wear gloves‚ goggles‚ and ear protection when handling metal siding․ Sharp edges can cause injuries‚ so work carefully and avoid rushing the installation process․
4․1 Necessary Safety Gear
Safety is paramount when installing vertical metal siding․ Essential gear includes gloves to prevent cuts‚ goggles to protect eyes from debris‚ and ear protection for noisy tasks․ Steel-toe boots are crucial for preventing foot injuries from heavy tools or materials․ Wearing long sleeves and pants can shield skin from sharp edges․ Ensure all gear fits properly and is in good condition to maximize protection․ Regularly inspect equipment to maintain safety standards throughout the project․
4․2 Avoiding Common Hazards
When installing vertical metal siding‚ be mindful of potential hazards․ Sharp edges can cause injuries‚ so handle panels with care․ Ensure proper alignment to avoid uneven surfaces that may lead to water retention or structural issues․ Working at heights requires sturdy ladders and harnesses to prevent falls․ Keep tools well-maintained to avoid malfunctions․ Additionally‚ wear proper safety gear and follow manufacturer guidelines to minimize risks and ensure a smooth installation process․
Measuring and Cutting Panels
Accurate measuring and precise cutting are critical for a seamless installation․ Use a tape measure to ensure panels fit perfectly‚ avoiding misalignment or water retention issues․
5․1 Accurate Measurement Techniques
Accurate measurements are essential for a successful installation․ Use a high-quality tape measure to record the height and width of each wall section․ Double-check your measurements before cutting panels to ensure proper fit and alignment․ Consider using a laser level for precise vertical alignment․ Measure from the base to the top‚ accounting for any obstructions or uneven surfaces․ Record measurements clearly and transfer them directly to the panels using a marker or pencil․ Always verify panel lengths against the structure to avoid mismatches․
5․2 Safe Cutting Practices
Always wear safety gear‚ including gloves‚ goggles‚ and ear protection‚ when cutting metal siding․ Use a saw or metal shears designed for cutting metal to ensure clean cuts․ Cut slowly and carefully to avoid accidents․ Keep loose clothing tied back and long hair secured․ Work in a well-ventilated area to prevent inhaling metal dust․ Use a stable work surface and consider clamping panels to prevent movement during cutting․ Avoid applying excessive pressure‚ which can cause the tool to slip and lead to injuries․ Keep bystanders away from the cutting area for added safety․

Installing Vertical Metal Siding
Start by aligning the first panel with the bottom edge‚ ensuring it is level and secure․ Proceed row by row‚ overlapping panels as specified․
6․1 Starting the Installation
Begin by aligning the first panel at the bottom edge‚ ensuring it is level and secure․ Use a spirit level to confirm alignment and fasten the panel at the center‚ working outward to prevent warping․ Ensure proper overlap between panels‚ typically 1 inch‚ and verify manufacturer guidelines for specific instructions․ Starting correctly sets the foundation for a smooth‚ professional installation․
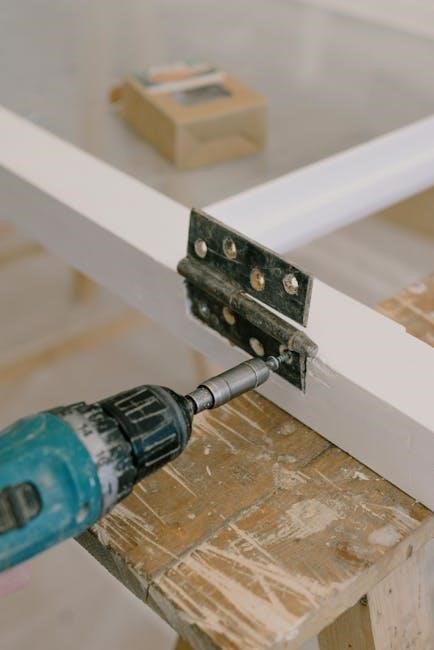
6․2 Fastening Panels Correctly
Secure panels using self-tapping screws‚ spaced 12-16 inches apart‚ starting from the bottom and working upward․ Ensure screws are driven straight through the nailing flange without over-tightening‚ which can cause distortion․ Proper spacing and alignment are critical for a flush finish․ Always follow manufacturer guidelines for screw type and placement to maintain structural integrity and weather tightness․ Double-check each panel’s alignment before fastening to ensure a seamless installation․
6․3 Handling Edges and Corners
For a seamless finish‚ use J-Channel trim to cover raw edges of vertical metal siding panels․ At corners‚ install flashing or corner posts to ensure weather tightness and a clean appearance․ When meeting edges‚ align panels precisely and secure with screws․ For windows and doors‚ build out casings using trim boards to provide a surface for butting panels․ This step enhances aesthetics and hides gaps․ Properly sealing edges and corners is essential for long-term durability and structural integrity․
Finishing Touches
Install trim and flashing to cover edges and corners‚ ensuring a polished look․ Seal gaps between panels and joints to prevent water infiltration and maintain weather tightness․
7․1 Installing Trim and Flashing
Trim and flashing are essential for completing the vertical metal siding installation․ Start by installing J-channels around windows‚ doors‚ and corners to create a snug fit for the siding panels․ Ensure all edges are covered to prevent water infiltration and enhance the overall appearance․ Flashing should be securely fastened with screws or nails‚ leaving space for expansion․ Properly fitting these components hides raw edges and provides a professional finish․ Use trim boards to build out casings for a polished look‚ ensuring all gaps are sealed tightly․
7․2 Sealing Gaps and Joints
Sealing gaps and joints is crucial to ensure weather tightness and prevent moisture damage․ Use high-quality weatherproof sealants or butyl tape to fill gaps between panels‚ trim‚ and flashing․ Apply sealants evenly‚ ensuring full coverage without overfilling․ For joints between panels‚ use silicone-based sealants designed for exterior use; Clean surfaces thoroughly before applying sealants to ensure proper adhesion․ Inspect all joints post-installation to confirm they are watertight․ This step ensures long-term durability and protects your vertical metal siding from environmental elements․
Post-Installation Inspection
After installation‚ inspect the vertical metal siding for proper alignment‚ secure fastening‚ and weather tightness․ Ensure all panels are evenly spaced and sealed correctly to guarantee long-term performance and durability․
8․1 Checking for Alignment and Fit
During post-installation inspection‚ ensure each vertical metal siding panel is perfectly aligned and fits snugly without gaps․ Verify that all edges are straight and panels are securely fastened to the substrate․ Proper alignment prevents water infiltration and ensures a smooth‚ professional appearance․ Use a level to check vertical orientation and inspect seams for consistency․ Addressing any misalignment promptly avoids structural issues and maintains the siding’s integrity and aesthetic appeal over time․
8․2 Ensuring Weather Tightness
After installation‚ inspect all seams‚ edges‚ and joints to ensure complete weather tightness․ Verify that flashing profiles are correctly installed to shed water effectively․ Check for proper sealing around windows‚ doors‚ and corners․ Any gaps or misaligned panels should be addressed immediately to prevent water infiltration․ Use appropriate sealants where necessary‚ and ensure all fasteners are securely tightened․ Proper weather tightness is crucial for maintaining the structural integrity and long-term performance of your vertical metal siding system․
Maintenance and Troubleshooting
Regular inspections and cleaning are essential for maintaining vertical metal siding․ Address minor damages promptly to prevent rust and ensure optimal performance‚ longevity‚ and aesthetic appeal․
9․1 Regular Maintenance Tips
Regular inspections ensure the longevity of vertical metal siding․ Check panels‚ fasteners‚ and joints for damage or loosening․ Wash the siding annually with mild detergent to remove dirt and mildew․ Trim vegetation to prevent moisture buildup and ensure proper drainage․ Reapply sealants around edges and joints as needed․ Address scratches or dents promptly to avoid rust․ Replace damaged panels to maintain structural integrity and aesthetic appeal․ Regular upkeep prevents major issues and retains the siding’s durability and appearance․
- Inspect panels and fasteners regularly․
- Wash siding annually with mild detergent․
- Trim vegetation to reduce moisture exposure․
- Reapply sealants as needed;
- Address scratches or dents promptly․
- Replace damaged panels to maintain integrity․
9․2 Common Issues and Solutions
Common issues with vertical metal siding include loose panels‚ water leakage‚ and scratches․ Address loose panels by tightening fasteners and replacing damaged ones․ For water leakage‚ inspect and reseal gaps around flashing and joints․ Scratches can be touched up with matching paint to prevent rust․ Regular inspections and timely repairs prevent minor issues from becoming major problems‚ ensuring the siding remains durable and visually appealing․
- Loose Panels: Tighten fasteners; replace damaged panels․
- Water Leakage: Inspect and reseal gaps around flashing and joints․
- Scratches: Touch up with matching paint to prevent rust․