
Sharpening chisels is essential for woodworking efficiency, requiring precision and care. A honing guide helps achieve consistent results, making the process easier for both professionals and newcomers alike.
1.1 Importance of Sharp Chisels in Woodworking
A sharp chisel is indispensable in woodworking, ensuring precise cuts and clean finishes. Dull chisels require more force, increasing the risk of accidents and damage to materials. Properly honed tools enhance control, efficiency, and safety, making them essential for both professionals and hobbyists. A well-sharpened chisel is not just a tool but a key to achieving professional-grade results in woodworking projects.
1.2 Brief Overview of Honing Guides and Their Role
A honing guide is a tool designed to maintain the correct angle when sharpening chisels, ensuring precision and consistency. It simplifies the process, especially for beginners, by aligning the chisel accurately. Guides work with various sharpening materials, like diamond stones or sandpaper, to achieve a razor-sharp edge. They are indispensable for professionals and hobbyists, helping to refine skills and maintain tool quality effectively.
Understanding Honing Guides
Honing guides are essential tools for precise chisel sharpening, ensuring consistent angles and sharp edges. They simplify the sharpening process, making it accessible to professionals and newcomers alike.
2.1 What is a Honing Guide?
A honing guide is a precision tool designed to help maintain consistent angles while sharpening chisels. It securely holds the chisel in place, ensuring even contact with the sharpening stone. This tool is particularly useful for maintaining precise control during the sharpening process, especially for those who may not have extensive experience. By using a honing guide, users can achieve professional-grade sharpness with minimal effort and practice.
2.2 Types of Honing Guides Available
Honing guides come in various designs, catering to different needs and preferences. The most common types include roller guides, which use a cylindrical roller for stability, and adjustable guides that allow for precise angle settings. Some models are specifically designed for chisels of varying sizes, while others are versatile enough to accommodate both chisels and plane blades, offering flexibility for woodworking enthusiasts.

Preparing the Chisel for Honing
Inspect the chisel for damage or debris and clean it thoroughly. Ensure the blade is properly aligned and secured before honing to achieve optimal sharpening results.
3.1 Inspecting the Chisel for Damage
Before sharpening, examine the chisel for cracks, nicks, or rust. Check the edge for straightness and the handle for looseness. Remove any debris or residue using a solvent. Inspecting ensures you address issues early, preventing further damage during honing and maintaining tool longevity. A damaged chisel may require repair before sharpening for safe and effective use.
3.2 Setting Up the Chisel for Sharpening
Mount the chisel securely in a vice or honing guide, ensuring the bevel faces the correct direction. Align the edge with the desired sharpening angle, typically between 20° to 30°. Secure the chisel firmly to maintain stability during the sharpening process. Proper setup is crucial for achieving a precise edge and ensuring safety while working with sharpening tools and stones.

Step-by-Step Guide to Using a Honing Guide
Attach the chisel to the guide, ensuring proper alignment. Start with coarse grit for shaping, then progress to fine grit for polishing. Repeat as needed for sharpness.
4.1 Selecting the Correct Angle for Honing
Choosing the right angle is crucial for effective sharpening. Most chisels require between 20° and 30°, depending on their intended use. Japanese chisels often use a narrower angle, around 25°, while heavier-duty chisels may need up to 35°. Always refer to the manufacturer’s guidelines or use a honing guide with adjustable settings for precision.
4.2 Attaching the Chisel to the Honing Guide

Align the chisel’s edge with the guide’s roller or clamping mechanism, ensuring proper seating. Clamp firmly but avoid over-tightening, which could damage the tool or misalign the blade. Adjust the guide to maintain the desired angle, ensuring the chisel is secure before sharpening begins.
4.3 Sharpening with Coarse and Fine Grit Stones
Start with a coarse-grit stone to remove metal and restore the edge. Use smooth, consistent strokes, maintaining the angle set by the honing guide. Once sharp, switch to a fine-grit stone for polishing, ensuring a razor-sharp finish. Always keep the stones lubricated to prevent overheating and maintain effectiveness throughout the sharpening process.

Sharpening Chisels Without a Honing Guide
Sharpening without a guide requires skill and practice, relying on precise angle control and consistent strokes to achieve a sharp edge effectively.
5.1 Freehand Sharpening Techniques
Freehand sharpening involves holding the chisel directly against the stone without a guide. It requires maintaining the correct angle and using smooth, consistent strokes to hone the edge. This method demands practice to achieve precision and avoid unevenness, making it challenging for beginners but highly rewarding once mastered for maintaining sharp tools effectively.
5.2 Using Abrasive Paper for Honing

Abrasive paper offers a practical alternative for sharpening chisels, especially for those new to honing. It allows for precise control over the sharpening angle and pressure, making it ideal for finer adjustments. Starting with coarse grits and progressing to finer ones ensures a sharp, polished edge. This method is cost-effective and accessible, providing satisfactory results without specialized tools.

Common Mistakes to Avoid
Common errors include over-sharpening, causing heat damage, and using incorrect angles. Proper technique and patience are crucial to avoid these pitfalls and achieve optimal results.
6.1 Over-Sharpening and Heat Damage
Over-sharpening can lead to excessive wear and unnecessary loss of metal. Applying too much pressure or sharpening for too long generates heat, which can damage the tool’s edge. Heat damage softens the steel, reducing its durability and sharpness. To prevent this, use light strokes, monitor temperature, and employ water or oil-cooled stones. Regular breaks during sharpening also help maintain the chisel’s integrity and performance.
6.2 Incorrect Angle Alignment
Incorrect angle alignment is a common mistake that can lead to uneven edges and poor tool performance. Always reference the manufacturer’s recommended angle and double-check the honing guide’s setup. Even minor deviations can result in a less-than-optimal cutting edge, reducing the chisel’s effectiveness and requiring additional sharpening to correct.
Maintenance and Storage of Honed Chisels
Proper maintenance involves cleaning and drying chisels after use, storing them in protective cases to prevent rust and dullness, and regular inspection for optimal performance.
7.1 Cleaning and Drying After Use
Cleaning and drying chisels after use is crucial for maintaining sharpness and preventing rust. Wipe the blade with a dry cloth to remove residue. For tougher grime, use a mild solvent and dry thoroughly. Store in a protective case or on a clean, dry surface to preserve edge quality and longevity.
7.2 Storing Chisels to Prevent Dullness
Proper storage is key to maintaining chisel sharpness. Store chisels in a protective case, wood block, or magnetic strip to prevent contact with hard objects. Keep them clean, dry, and separated by size to avoid accidental dulling. Apply a light layer of oil or wax for rust protection. Regular inspection ensures edges remain sharp and ready for use.
Advanced Honing Techniques
Advanced techniques refine edge precision, such as creating secondary bevels for specialized cuts and mastering Japanese-style chisels for intricate woodworking, ensuring enhanced tool performance and craftsmanship.
8.1 Creating a Secondary Bevel
A secondary bevel enhances chisel versatility by providing a steeper angle for specific tasks. Using a honing guide, carefully adjust the angle beyond the primary bevel, ensuring consistency. This technique is particularly useful for detailed woodworking, allowing for cleaner cuts and improved control. Regular practice refines the skill, making it an invaluable asset for advanced projects.

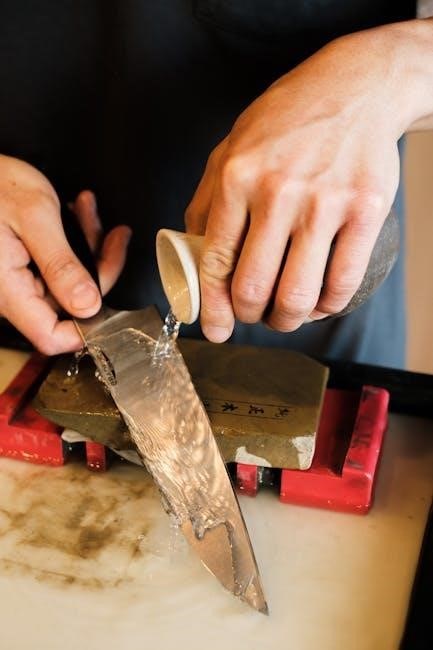
8.2 Honing Japanese-Style Chisels
Honing Japanese chisels requires precision due to their unique steel composition. A honing guide helps maintain the precise 30-degree angle typical for these tools. Using sandpaper and a guide, regrind the edge to achieve razor sharpness. This method ensures consistency and preserves the chisel’s durability, making it ideal for intricate woodworking tasks that demand high accuracy and clean results.
Troubleshooting Common Issues
A crooked edge can result from misalignment. Correct by realigning the chisel in the guide and sharpening evenly to restore straightness.
9.1 Fixing a Crooked Edge
A crooked edge often results from improper alignment in the honing guide. To fix this, ensure the chisel is securely clamped and the guide is properly calibrated. Lightly sharpen the longer side to balance the edge, checking progress with a marker. Repeat until the edge is straight and even, maintaining consistent strokes for optimal results.
9.2 Restoring Severely Dull or Damaged Chisels
For severely dull or damaged chisels, start with coarse grit stones to remove significant damage. Use the honing guide to maintain consistent angles and gradually progress to finer grits. Check for even wear and avoid applying too much pressure, which can cause heat damage. Once the edge is restored, finish with a fine stone for a razor-sharp result.

Choosing the Right Honing Guide
Selecting the right honing guide ensures precision and durability. Look for adjustability to accommodate various chisel sizes. Check reviews and product specs to find the best fit for your needs.
10.1 Features to Look for in a Honing Guide
When selecting a honing guide, key features include adjustable angle settings, universal chisel compatibility, and sturdy construction. A guide with precise alignment and smooth operation ensures consistent sharpening results. Look for models that accommodate various chisel widths and lengths. Durability and ease of use are also crucial factors to consider for long-term effectiveness and satisfaction.
10.2 Reviews and Recommendations
Top-rated honing guides include Veritas, Sharp Pebble, and Eclipse. Veritas models are praised for precision and durability, though some users find them complex. Sharp Pebble guides are popular for ease of use and affordability. Eclipse guides are favored for their versatility with various chisel sizes. Reviews suggest starting with a mid-range guide to balance quality and cost, ensuring optimal sharpening results for woodworking projects.
Mastering chisel sharpening with a honing guide enhances woodworking efficiency and precision. Consistent practice refines skills, ensuring razor-sharp tools for optimal performance in every project.
11.1 Summary of Key Takeaways
Using a honing guide ensures consistent chisel sharpening results. Start with coarse grit for repair, then fine grit for polishing. Avoid over-sharpening and incorrect angles. Proper storage and cleaning maintain sharpness. Practice refine skills for precise, efficient woodworking.
11.2 Encouragement to Practice and Refine Skills
Sharpening chisels is a skill that improves with practice. Embrace challenges and celebrate small victories—each session builds mastery. Regular honing keeps tools sharp and ready, enhancing woodworking creativity and efficiency. Stay patient, persistent, and enjoy the satisfaction of achieving razor-sharp edges that elevate your craft.