Ultimate Guide to Home Repair and Improvement: An Overview
Embarking on home projects boosts value and comfort! This comprehensive guide empowers you with knowledge, from simple fixes to larger renovations, ensuring a well-maintained haven.
I. Essential Tools & Safety First
Before diving into any home repair or improvement project, prioritizing safety and having the right tools is paramount. A well-equipped toolkit isn’t just about convenience; it’s about executing tasks efficiently and, more importantly, safely. Ignoring safety protocols can lead to injuries and costly mistakes.
This section will detail the fundamental tools every homeowner should possess – from screwdrivers and wrenches to measuring tapes and levels. We’ll also cover the importance of investing in quality tools that will withstand repeated use and provide reliable performance.
Furthermore, we’ll emphasize the critical role of Personal Protective Equipment (PPE), including safety glasses, gloves, and dust masks; Understanding and adhering to electrical and plumbing safety guidelines is non-negotiable. We’ll provide clear instructions and warnings to help you avoid potential hazards and ensure a secure working environment. Remember, a little preparation goes a long way in preventing accidents and achieving successful results.
A. Must-Have Tool Kit
A foundational tool kit is the cornerstone of any successful DIY endeavor. Start with a good quality screwdriver set – both Phillips head and flathead – in various sizes. A combination wrench set, adjustable wrench, and pliers are equally essential for tackling nuts and bolts. Don’t forget a measuring tape (at least 25 feet), a level (spirit or laser), and a utility knife.
For cutting, a handsaw and a hacksaw are useful additions. A hammer, both claw and rubber mallet, will cover most striking needs. A drill/driver combo is a significant investment, offering versatility for screwing and drilling. Consider a stud finder for secure wall mounting.
Safety should be included in your kit: safety glasses, work gloves, and a dust mask are non-negotiable. A voltage tester is crucial for electrical work. Organization is key – a toolbox or tool bag will keep everything readily accessible. Prioritize quality over quantity; durable tools will last longer and perform better.
B. Personal Protective Equipment (PPE)
Prioritizing safety during home repair is paramount; Personal Protective Equipment (PPE) isn’t optional, it’s essential. Begin with eye protection – safety glasses or goggles shield against flying debris. Work gloves protect your hands from cuts, abrasions, and chemicals. A dust mask or respirator is crucial when sanding, sawing, or dealing with mold, preventing inhalation of harmful particles.
Hearing protection, like earplugs or earmuffs, is vital when using power tools. For tasks involving potential head injuries, a hard hat is necessary. When working with chemicals, appropriate gloves and potentially a face shield are required.
Foot protection is often overlooked; sturdy work boots with steel toes offer significant protection. Consider knee pads for prolonged work on the floor. Always inspect your PPE for damage before each use. Investing in quality PPE is an investment in your well-being, preventing injuries and ensuring a safe working environment.
C. Electrical Safety Protocols
Working with electricity demands utmost caution. Always assume all wires are live. Before commencing any electrical work, always switch off the power at the breaker box and verify it’s off with a non-contact voltage tester. Never work on electrical systems in wet conditions. Use insulated tools specifically designed for electrical work – these have rubber grips for added safety.
Avoid overloading circuits; understand the amperage rating of your circuits and appliances. If you’re unsure about wiring colors or connections, consult a qualified electrician. Never attempt repairs beyond your skill level. Properly ground all electrical devices and outlets.
Be aware of arc flash hazards, especially when working with higher voltages. Keep a fire extinguisher rated for electrical fires nearby. If you experience a shock, immediately disconnect the power source and seek medical attention. Prioritize safety – electricity is unforgiving.
D. Plumbing Safety Considerations
Plumbing work, while often seemingly simple, presents several safety concerns. Always shut off the water supply before beginning any repairs to prevent flooding. Wear safety glasses to protect your eyes from debris and potential splashes. When working with drain cleaners, follow the manufacturer’s instructions carefully and ensure adequate ventilation – these chemicals can be corrosive and release harmful fumes.
Be mindful of hot water pipes; allow them to cool before touching them. Avoid using excessive force when tightening pipe connections, as this can damage the pipes or fittings. When soldering pipes, work in a well-ventilated area and use appropriate heat-resistant gloves.
If dealing with sewage lines, wear gloves and a mask to protect against bacteria and odors. Never mix different types of drain cleaners. If you encounter lead pipes, take precautions to avoid lead contamination – consult a professional for replacement. Prioritize hygiene and safety during all plumbing tasks.

II. Basic Home Repairs – DIY Solutions
Tackle common household issues confidently! These straightforward repairs require minimal skill and tools, saving you money and empowering you to maintain your living space effectively.
A. Fixing Leaky Faucets
A dripping faucet isn’t just annoying; it wastes water and increases your bill. Fortunately, fixing most leaky faucets is a relatively simple DIY project. Begin by identifying the faucet type – compression, cartridge, ball, or ceramic disc – as the repair process differs.
First, shut off the water supply to the faucet. Then, disassemble the faucet handle, carefully noting the order of parts. For compression faucets, replace worn-out washers. Cartridge faucets often require replacing the entire cartridge. Ball faucets may need new O-rings and springs. Ceramic disc faucets usually need a replacement disc.
Lubricate new parts with plumber’s grease before reassembly. Tighten connections securely, but avoid over-tightening. Slowly turn the water supply back on and check for leaks. If the leak persists, double-check your work or consider seeking professional help. Remember safety first – always disconnect power if dealing with garbage disposal connected faucets!
B. Unclogging Drains
Dealing with a clogged drain is a common household issue. Before resorting to harsh chemicals, try simpler methods. Begin with boiling water – carefully pour it down the drain to dissolve grease and soap buildup. If that doesn’t work, create a mixture of baking soda and vinegar. Pour one cup of baking soda followed by one cup of vinegar down the drain, let it fizz for 30 minutes, then flush with hot water.
For more stubborn clogs, a plunger is your best friend. Ensure there’s enough water in the sink or tub to cover the cup of the plunger, create a tight seal, and plunge vigorously. Alternatively, a drain snake (or auger) can physically break up or retrieve the clog.
When using a drain snake, carefully feed it into the drain and rotate it to grab the blockage. Pull it out slowly, cleaning off any debris. Avoid using chemical drain cleaners as they can damage pipes and are harmful to the environment. If all else fails, it’s time to call a plumber.
C. Patching Small Holes in Walls
Small holes in walls, often caused by nails or screws, are easily repaired. First, clean the area around the hole, removing any loose debris or crumbling drywall. Use a putty knife to apply spackle or drywall compound to the hole, slightly overfilling it. This ensures a smooth finish.
Allow the spackle to dry completely, following the manufacturer’s instructions – typically a few hours. Once dry, use a sanding block or sandpaper to gently sand the patched area flush with the surrounding wall. Be careful not to sand too aggressively, which could damage the surrounding drywall.
Finally, prime the patched area with a primer to seal the repair and ensure proper paint adhesion. Once the primer is dry, apply a coat of paint that matches the existing wall color. You may need two coats for complete coverage. For larger holes, consider using a self-adhesive drywall patch before applying spackle.
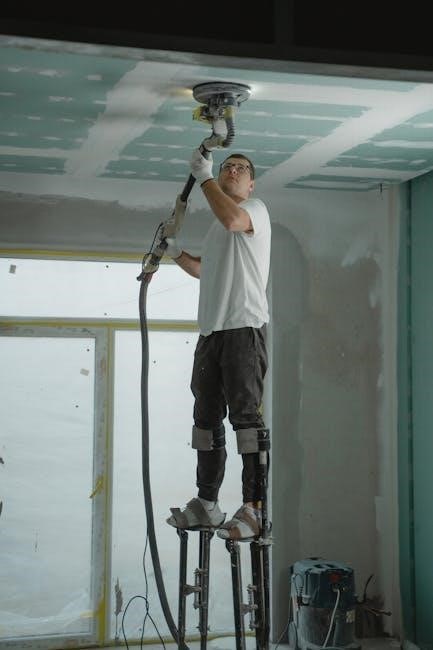
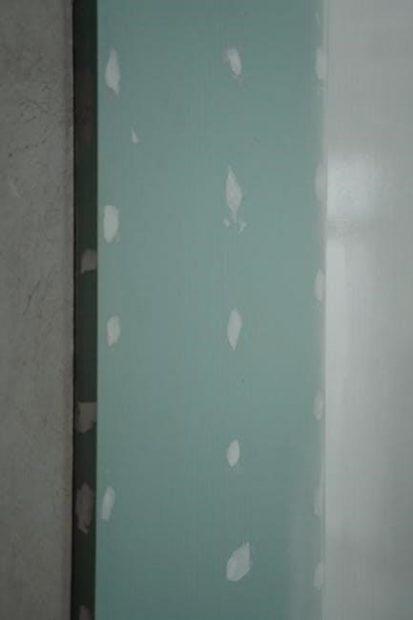
D. Repairing Drywall
Larger drywall damage, beyond small holes, requires a bit more effort. Begin by cutting away any loose or damaged drywall with a drywall saw, creating a clean, square or rectangular opening. Measure the opening carefully to determine the size of the replacement drywall patch needed.
Cut a new piece of drywall to precisely fit the opening. Secure the patch to the wall studs using drywall screws, ensuring the screws are countersunk slightly below the surface. Apply drywall tape over the seams between the patch and the existing wall, embedding it in a thin layer of joint compound.
Apply several coats of joint compound, allowing each coat to dry completely before sanding smooth. Feather the edges of the compound to blend seamlessly with the surrounding wall. Prime the repaired area and then paint to match the existing wall color. For significant damage, consider adding backing support before installing the patch.

III. Intermediate Home Improvement Projects
Elevate your home with projects demanding skill and precision! These improvements, like painting or shelving, add significant value and personalize your living space beautifully.
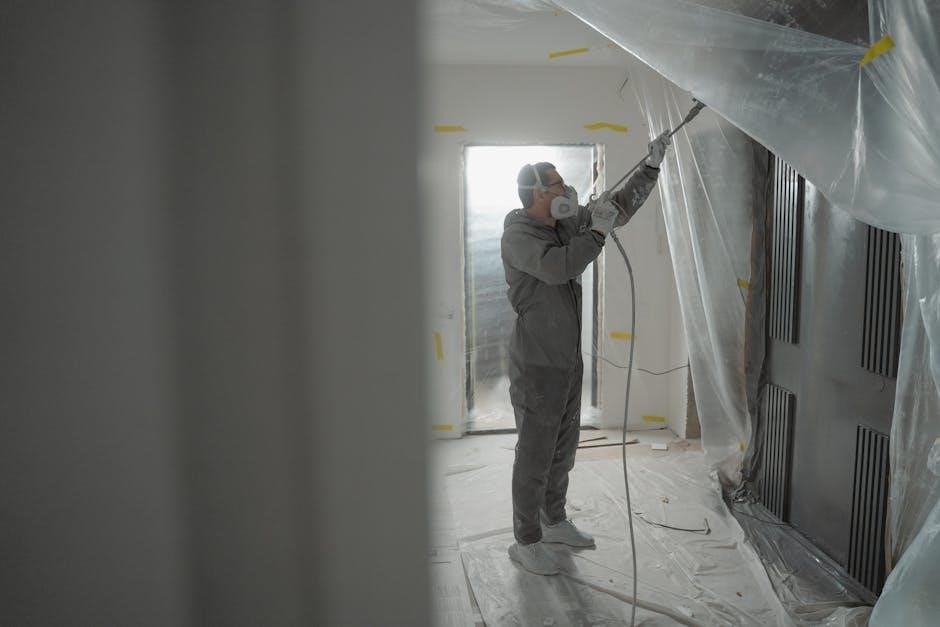
A. Painting Techniques – Walls & Trim
Transforming a room with paint is a remarkably effective and relatively inexpensive home improvement. Proper preparation is key: thoroughly clean the surfaces, repair any imperfections with spackle, and prime for optimal adhesion and color vibrancy. When painting walls, begin with “cutting in” – carefully painting the edges where the wall meets the ceiling, trim, or corners using an angled brush.
Employ roller techniques like a “W” or “V” pattern, overlapping each stroke slightly to avoid streaks. Apply two coats for full coverage, allowing each coat to dry completely. Painting trim requires a different approach. Use high-quality enamel paint for durability and a smooth finish. Apply thin, even coats with a brush, following the grain of the wood.
Consider sheen levels – matte for low-traffic areas, eggshell or satin for moderate use, and semi-gloss or gloss for trim and doors. Proper ventilation is crucial, and always use painter’s tape to protect adjacent surfaces for crisp, professional-looking results. Don’t forget to clean your brushes and rollers immediately after use!
B. Installing Shelving
Adding shelving instantly increases storage and enhances a room’s aesthetic. Begin by carefully planning the shelf placement, considering weight capacity and desired functionality. Locate wall studs using a stud finder – these provide the necessary support for heavier loads. If studs aren’t ideally positioned, use appropriate wall anchors for drywall or plaster.
Mark the shelf positions accurately, ensuring they are level using a spirit level. Pre-drill pilot holes to prevent wood splitting and facilitate screw insertion. Attach shelf brackets securely to the wall studs or anchors. Choose brackets rated for the anticipated weight. Once the brackets are in place, position the shelving boards on top and secure them to the brackets with screws.
For a finished look, consider adding shelf edging or decorative trim. Regularly check the shelving for stability, especially after loading with items. Different shelving types – floating, bracketed, or built-in – offer varying levels of complexity and visual appeal. Prioritize safety and accurate measurements throughout the installation process.
C. Replacing Light Fixtures
Upgrading light fixtures can dramatically change a room’s ambiance and functionality. Always begin by turning off the power at the circuit breaker – safety is paramount! Carefully remove the existing fixture, noting the wiring connections (photographing them is helpful). Disconnect the wires, using a voltage tester to confirm the power is off.

Install the mounting bracket for the new fixture, ensuring it’s securely attached to the electrical box. Connect the wires according to the fixture’s instructions – typically black to black (hot), white to white (neutral), and green or bare copper to ground. Gently tuck the wires into the electrical box and mount the new fixture.
Before restoring power, double-check all connections. Install the appropriate light bulb and test the fixture. If it doesn’t work, re-examine the wiring. Consider fixture weight; ensure the electrical box is rated to support it. For complex installations or if you’re uncomfortable working with electricity, consult a qualified electrician.
D; Upgrading Door Hardware
Replacing door hardware – knobs, locks, hinges – enhances security and aesthetics. Begin by removing the existing hardware. Unscrew the doorknob, then the strike plate on the door frame. For locks, you may need to remove a retaining clip. Carefully note the orientation of each piece for reassembly or to match the new hardware.
Install the new latch, ensuring it’s correctly aligned with the strike plate opening. Insert the new doorknob or lever, securing it with screws. Attach the new strike plate to the door frame, adjusting as needed for smooth operation. Test the lock and knob to ensure they function correctly.
If replacing hinges, align the new hinge with the existing mortise and secure it with screws. Tighten all screws firmly, but avoid over-tightening, which can strip the wood. Consider upgrading to heavier-duty hardware for increased security. For exterior doors, choose hardware with a high security rating.

IV. Advanced Home Improvement – When to Call a Pro
Certain projects demand expertise! Prioritize safety and compliance by engaging qualified professionals for complex tasks like electrical work, plumbing, roofing, and foundation repairs.
A. Electrical Wiring – Safety & Regulations
Electrical work is inherently dangerous and often requires permits, adhering to strict local and national codes – primarily the National Electrical Code (NEC). Incorrect wiring can lead to fires, shocks, and appliance damage. Never attempt electrical repairs if you lack experience and a thorough understanding of electrical principles.
Always disconnect power at the breaker box before working with any wiring. Use a non-contact voltage tester to confirm the power is off. Identify wires correctly – black (hot), white (neutral), and green or bare copper (ground). When replacing outlets or switches, ensure proper grounding.
Aluminum wiring, common in homes built between 1965 and 1978, poses a fire hazard and requires professional assessment and remediation. Upgrading electrical panels to accommodate increased power demands is also best left to licensed electricians. Ignoring regulations can void insurance coverage and create significant safety risks. Prioritize safety; when in doubt, call a pro!
B. Plumbing – Major Pipe Repairs
Major plumbing repairs, such as burst pipes, sewer line issues, or extensive leaks, demand professional attention. Attempting these repairs without proper knowledge and tools can exacerbate the problem, leading to costly water damage and potential health hazards. Ignoring significant plumbing issues can compromise your home’s structural integrity.
Identifying the source of a major leak often requires specialized equipment like cameras for inspecting pipes. Repairing or replacing sections of galvanized steel or cast iron pipes necessitates specific cutting, threading, and joining techniques. Working with drain lines requires understanding venting and trap systems to prevent sewer gases from entering your home.
Local plumbing codes dictate materials and installation methods. Permits are usually required for significant plumbing alterations. Furthermore, dealing with lead pipes or asbestos-containing materials requires specialized handling and disposal procedures. Don’t risk your safety or property; a qualified plumber ensures code compliance and a lasting solution.
C. Roofing Repairs & Replacement
Roofing issues, from minor leaks to complete replacements, require careful consideration and often, professional expertise; Working at heights presents significant safety risks, and improper repairs can lead to further damage and costly consequences. Identifying the type of roofing material – asphalt shingles, tile, metal, or wood – is crucial for selecting appropriate repair methods.
Minor repairs, like replacing damaged shingles, can be tackled by experienced DIYers, but require proper safety gear, including harnesses and secure ladders. Larger repairs, such as addressing flashing around chimneys or vents, are best left to professionals. A full roof replacement is a major undertaking involving underlayment, sheathing inspection, and precise material installation.
Local building codes dictate roofing material requirements and installation standards. Permits are almost always necessary for roof replacements. Ignoring these regulations can result in fines and necessitate rework. A professional roofing contractor will ensure proper ventilation, preventing moisture buildup and extending the roof’s lifespan.
D. Foundation Issues – Identifying & Addressing
Foundation problems are among the most serious and expensive home repairs. Early detection is key to preventing extensive damage. Common signs include cracks in walls (especially around doors and windows), uneven floors, sticking doors and windows, and noticeable gaps between walls and floors. Exterior clues include bulging or bowing foundation walls, and soil separation.
Minor hairline cracks are often normal settling, but larger cracks (wider than 1/4 inch) or those that are widening should be inspected by a structural engineer. Addressing foundation issues often involves soil stabilization, piering, or wall anchoring. These are complex procedures requiring specialized equipment and expertise.
Water management is crucial; ensure proper drainage away from the foundation. Gutters should be clean and downspouts extended. Ignoring foundation problems can compromise the structural integrity of the entire house, leading to significant safety hazards and diminished property value. Professional assessment is always recommended.

V. Maintaining Your Home – Preventative Measures
Proactive upkeep safeguards your investment! Regular inspections and timely maintenance prevent costly repairs, ensuring longevity and preserving your home’s value and comfort.
A. Gutter Cleaning & Maintenance
Gutters are crucial for directing water away from your foundation, preventing costly damage. Regular cleaning – at least twice yearly, or more often in areas with heavy foliage – is essential. Clogged gutters can lead to water overflow, causing basement flooding, landscape erosion, and even structural issues.
Safety first! Always use a sturdy ladder and wear gloves. Remove leaves, twigs, and debris by hand or with a gutter scoop. A garden hose can help flush out remaining particles. Inspect gutters for leaks, sagging sections, and damaged hangers. Repair or replace damaged components promptly.
Consider installing gutter guards to minimize debris buildup, reducing the frequency of cleaning. Different types are available, from mesh screens to foam inserts. Proper gutter maintenance extends the life of your roof and protects your home’s foundation, saving you significant expenses in the long run. Don’t neglect this vital aspect of home upkeep!

B. HVAC System Maintenance
Your Heating, Ventilation, and Air Conditioning (HVAC) system is a significant investment, and regular maintenance is key to its efficiency and longevity. A well-maintained system saves energy, lowers utility bills, and provides consistent comfort.
Start with simple tasks: regularly replace air filters – typically every 1-3 months – to improve airflow and air quality. Clear debris from around outdoor units. Schedule annual professional inspections and tune-ups. A technician will clean coils, check refrigerant levels, and inspect electrical components.
Listen for unusual noises, and address any concerns promptly. Consider a programmable thermostat to optimize energy usage. Ductwork should be inspected for leaks and sealed to prevent energy loss. Proper HVAC maintenance not only extends the system’s lifespan but also ensures a healthier indoor environment for you and your family. Prioritize this crucial home system!
C. Seasonal Home Checklists
Proactive home maintenance varies with the seasons. Spring demands inspection of roofing for winter damage, gutter cleaning, and checking exterior paint. Summer focuses on AC maintenance, deck/patio upkeep, and addressing any landscaping issues impacting the foundation.
Fall requires preparing for colder weather: sealing windows and doors, inspecting the heating system, and cleaning chimneys. Don’t forget leaf removal to prevent gutter blockages! Winter checklists include checking for ice dams, ensuring proper ventilation, and inspecting pipes for freezing risks.
Creating a customized checklist for each season ensures no crucial task is overlooked. Regularly inspect and test smoke and carbon monoxide detectors. Address minor repairs promptly to prevent them from escalating into larger, more costly problems. A seasonal approach keeps your home in optimal condition year-round, maximizing comfort and value.
D. Energy Efficiency Improvements
Reducing energy consumption benefits both your wallet and the environment. Start with simple steps like sealing air leaks around windows and doors with caulk or weather stripping. Insulating attics, walls, and floors significantly minimizes heat loss in winter and heat gain in summer.
Consider upgrading to energy-efficient appliances – look for the Energy Star label. Switching to LED lighting dramatically lowers electricity usage. A programmable thermostat optimizes heating and cooling schedules, preventing wasted energy when you’re away or asleep.
Further improvements include installing low-flow showerheads and faucets to conserve water and energy used for heating water. Evaluate your windows; energy-efficient windows can provide substantial savings. Regularly maintain your HVAC system for peak performance. These changes contribute to a more comfortable, sustainable, and cost-effective home.